
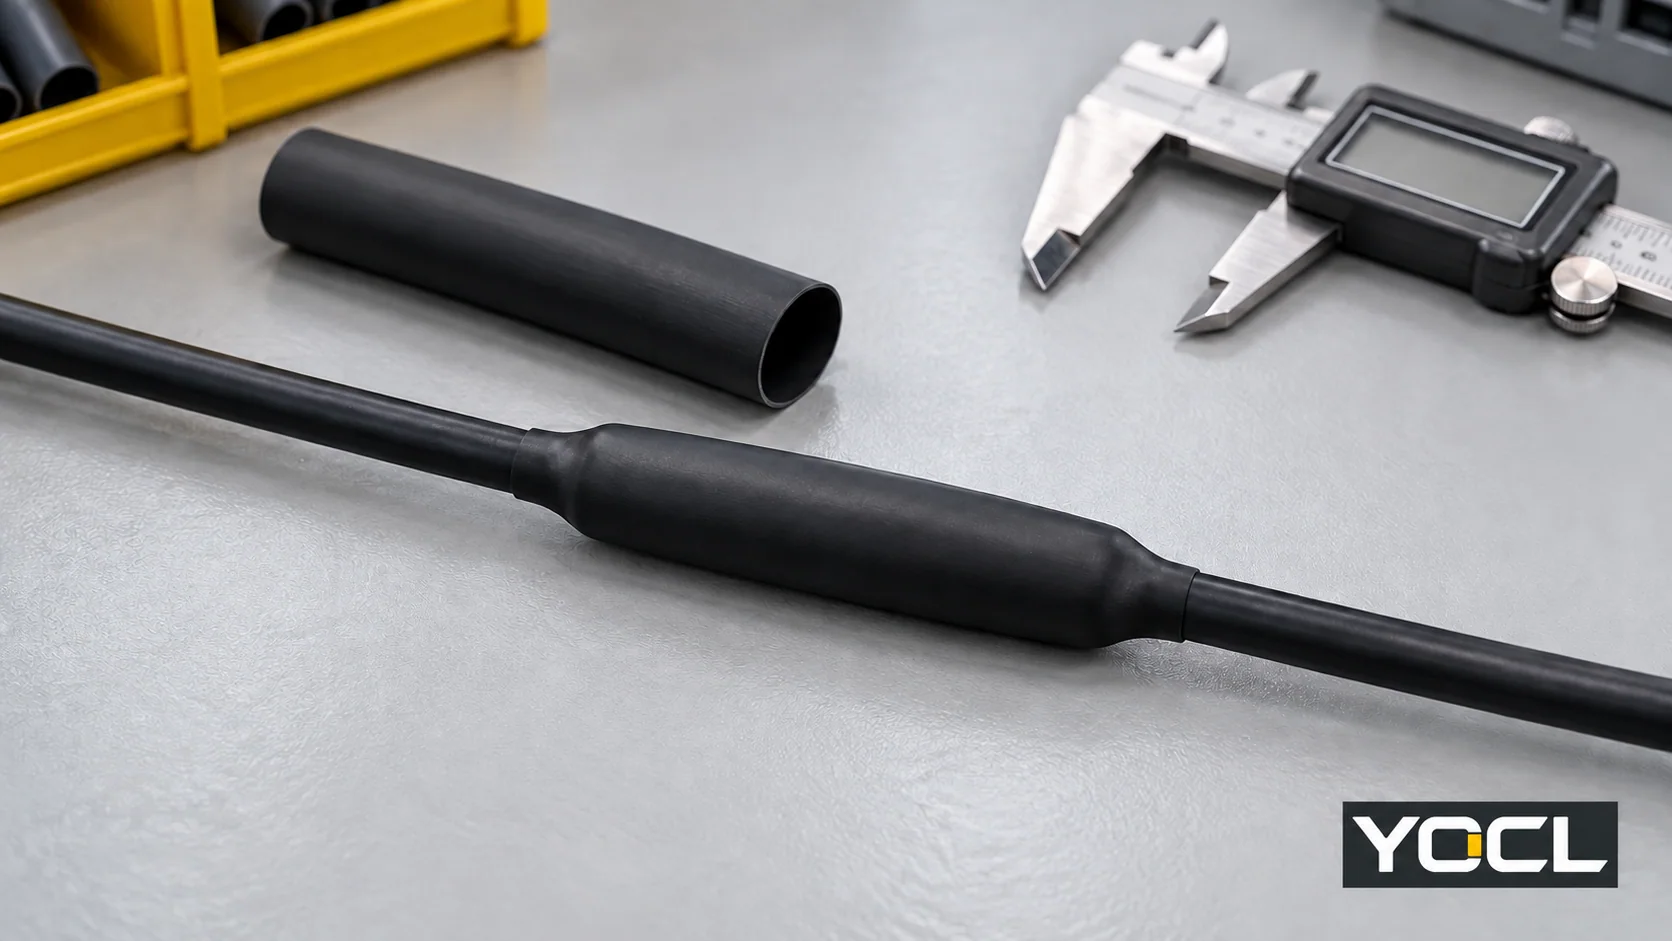
Pilih selongsong susut panas yang melewati fitur sambungan terbesar, pulih di bawah diameter pendaratan terkecil, dan mempertahankan cakupan yang diperlukan setelah susut. Potong dan muat sebelumnya sebelum menutup sambungan, terima sambungan listrik, posisikan selongsong, pulihkan dengan proses pemanasan yang ditentukan, lalu dinginkan, periksa, dan selesaikan pengujian perakitan yang diperlukan.
Prosedur ini mencakup sambungan inline lurus yang ditentukan. Selongsong susut panas memberikan insulasi atau perlindungan yang ditentukan; itu tidak membuat sambungan listrik. Sambungan berpelindung, multikabel, dan tegangan menengah atau tinggi memerlukan instruksi perakitan mereka sendiri. Selongsong yang pulih dengan rapat bukanlah bukti bahwa sambungan dapat diterima secara elektrik atau disegel secara lingkungan.
1. Konfirmasikan instruksi kerja dan isolasi
Sebelum memotong kabel atau mengaplikasikan panas, dapatkan gambar sambungan, instruksi penyambungan, data selongsong yang tepat, proses aplikasi, dan persyaratan penerimaan. Kerjakan pada sirkuit yang terisolasi yang diverifikasi tidak berenergi di bawah prosedur peralatan dan lokasi. Di U.S. tempat kerja, OSHA 1910.333(b) menetapkan penguncian/penandaan dan verifikasi oleh orang yang berkualifikasi.
Gunakan catatan pekerjaan untuk menghubungkan pengukuran dengan keputusan penerimaan akhir:
| Catat sebelum memulai | Keputusan yang dikontrolnya |
|---|---|
| Identifikasi kabel/jaket, sambungan, dan selongsong | Kompatibilitas material dan instruksi yang berlaku |
| Fitur terbesar pada jalur penyisipan selongsong | Diameter dalam yang dibutuhkan |
| Diameter luar pendaratan kiri dan kanan | Pemulihan yang dibutuhkan di kedua sisi |
| Rentang sambungan dan tumpang tindih yang ditentukan di setiap sisi | Cakupan akhir minimum |
| Tugas kelistrikan, lingkungan, dan ruang yang tersedia | Konstruksi, dinding, dan kesesuaian perakitan |
| Instruksi pemanasan, pendinginan, dan penerimaan | Batas proses dan pemeriksaan pelepasan |
Siapkan alat ukur yang sesuai, pemotong, alat penyambung yang ditentukan, dan sumber panas terkontrol yang diizinkan. Tahan pekerjaan jika instruksi yang diperlukan atau kriteria penerimaan hilang.
2. Pilih konstruksi dan periksa kedua diameter
Pilih konstruksi untuk tugas yang ditentukan. Rangkaian selongsong susut panas YOCL mencakup selongsong dinding tunggal HTS dan selongsong berlapis perekat HS3X/HS4X. Selongsong tanpa lapisan dapat memenuhi persyaratan insulasi/perlindungan; selongsong berlapis perekat memerlukan antarmuka jaket yang kompatibel dan proses aplikasi yang terverifikasi saat penyegelan diperlukan. Gunakan panduan dinding tunggal versus dinding ganda jika keputusan ini masih belum terselesaikan.
Ukur jalur penyisipan lengkap, termasuk bahu konektor apa pun yang harus dilalui selongsong. Catat kedua diameter pendaratan secara terpisah; luas penampang konduktor bukanlah diameter jaket. Periksa diameter dalam minimum yang disediakan terhadap fitur lintasan terbesar dan diameter dalam maksimum yang pulih terhadap pendaratan terkecil.
Prinsip lebih besar sebelum/lebih kecil sesudah muncul di Revisi F, §KSC-E-165 3.8.1.1.1(a), spesifikasi untuk peralatan kontrol dan pemantauan pendukung darat KSC. Ini mendukung layar dimensi ini, bukan margin instalasi universal.
Misalnya, asumsikan sebuah 7.4 mm fitur pass-over terbesar dan 4.0 mm pendaratan terkecil. Saat ini YOCL HS3X tabel memberikan:
| HS3X nominal size | Supplied ID | Recovered ID | Preliminary result |
|---|---|---|---|
| 6.4 mm | ≥6.4 mm | ≤2.2 mm | Guaranteed supplied minimum does not clear 7.4 mm |
| 9.5 mm | ≥9.5 mm | ≤3.2 mm | Clears both basic diameter checks |
The 9.5 mm row is a dimensional candidate, not an approved sealed splice. Confirm the required insertion allowance, tolerances, wall/space, duty and jacket compatibility. Consult the size chart for other rows; use the shrink-ratio comparison when passage and landing geometry demand another ratio.
3. Determine cut length and preload the sleeve
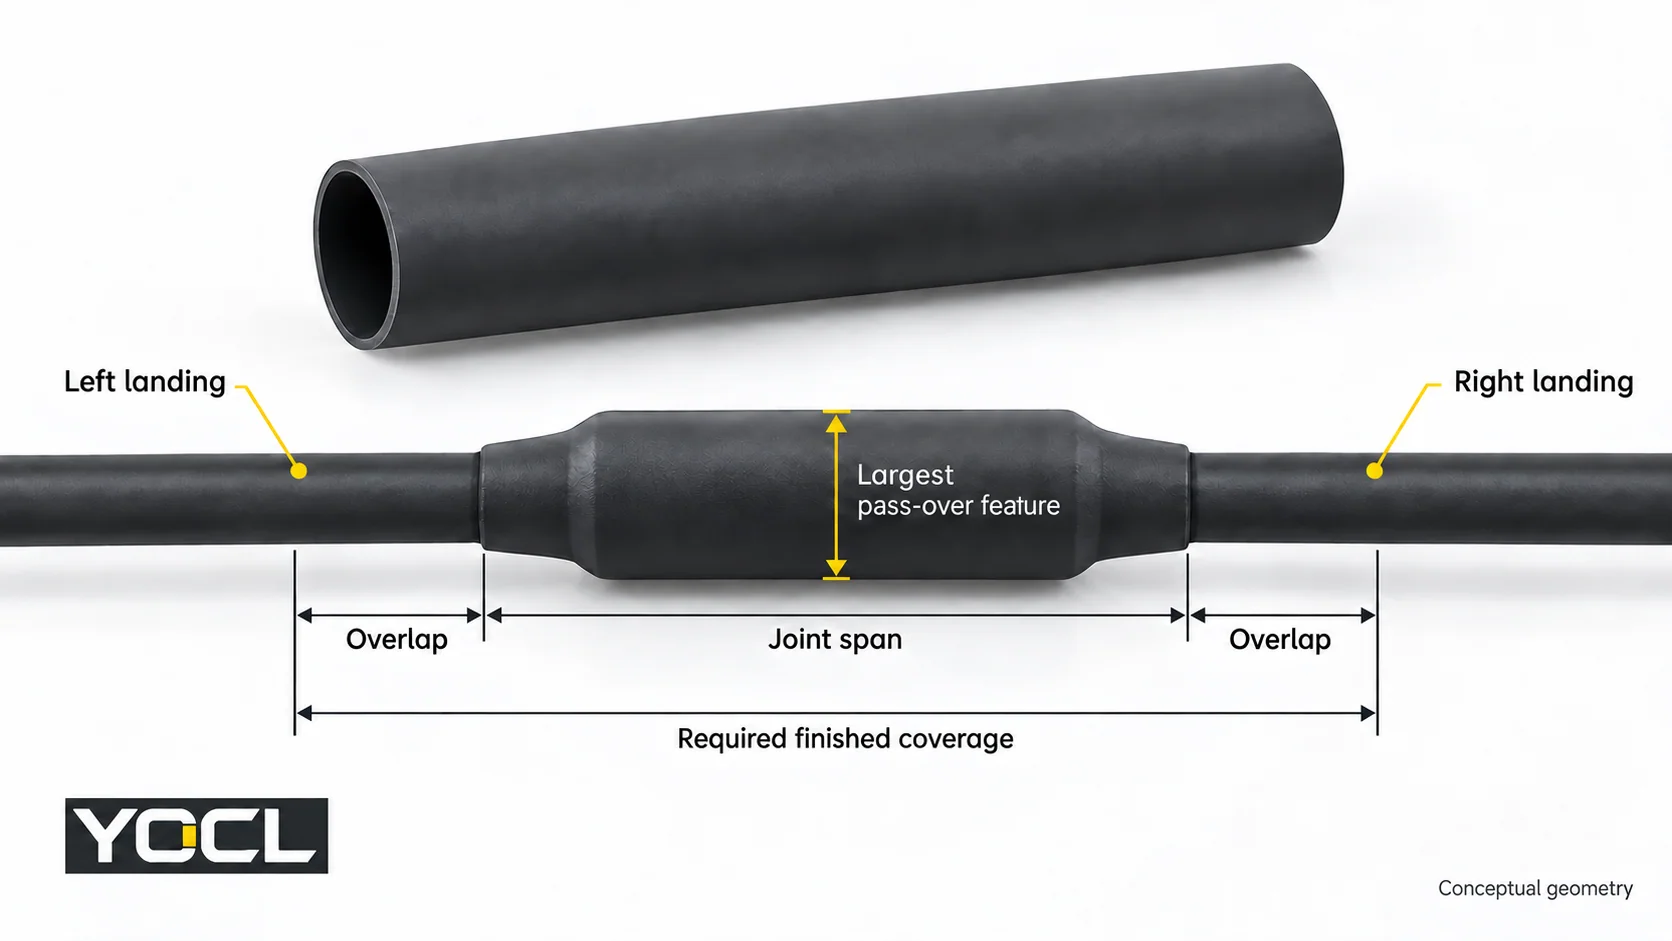
Finished coverage must include the joint span and the specified overlap on each side. Allow for longitudinal change using the applicable process data. Do not substitute an arbitrary extra-length percentage or a laboratory axial-change value for an established installation allowance.
Where the instructions establish a maximum shortening fraction s, a planning calculation is:
Minimum cut length = (joint span + left overlap + right overlap) ÷ (1 − s)
Use the specified overlap and validated s for that application, round up to the permitted cut length, and verify actual coverage after cooling. If those inputs are unknown, the calculation cannot release the sleeve for cutting.
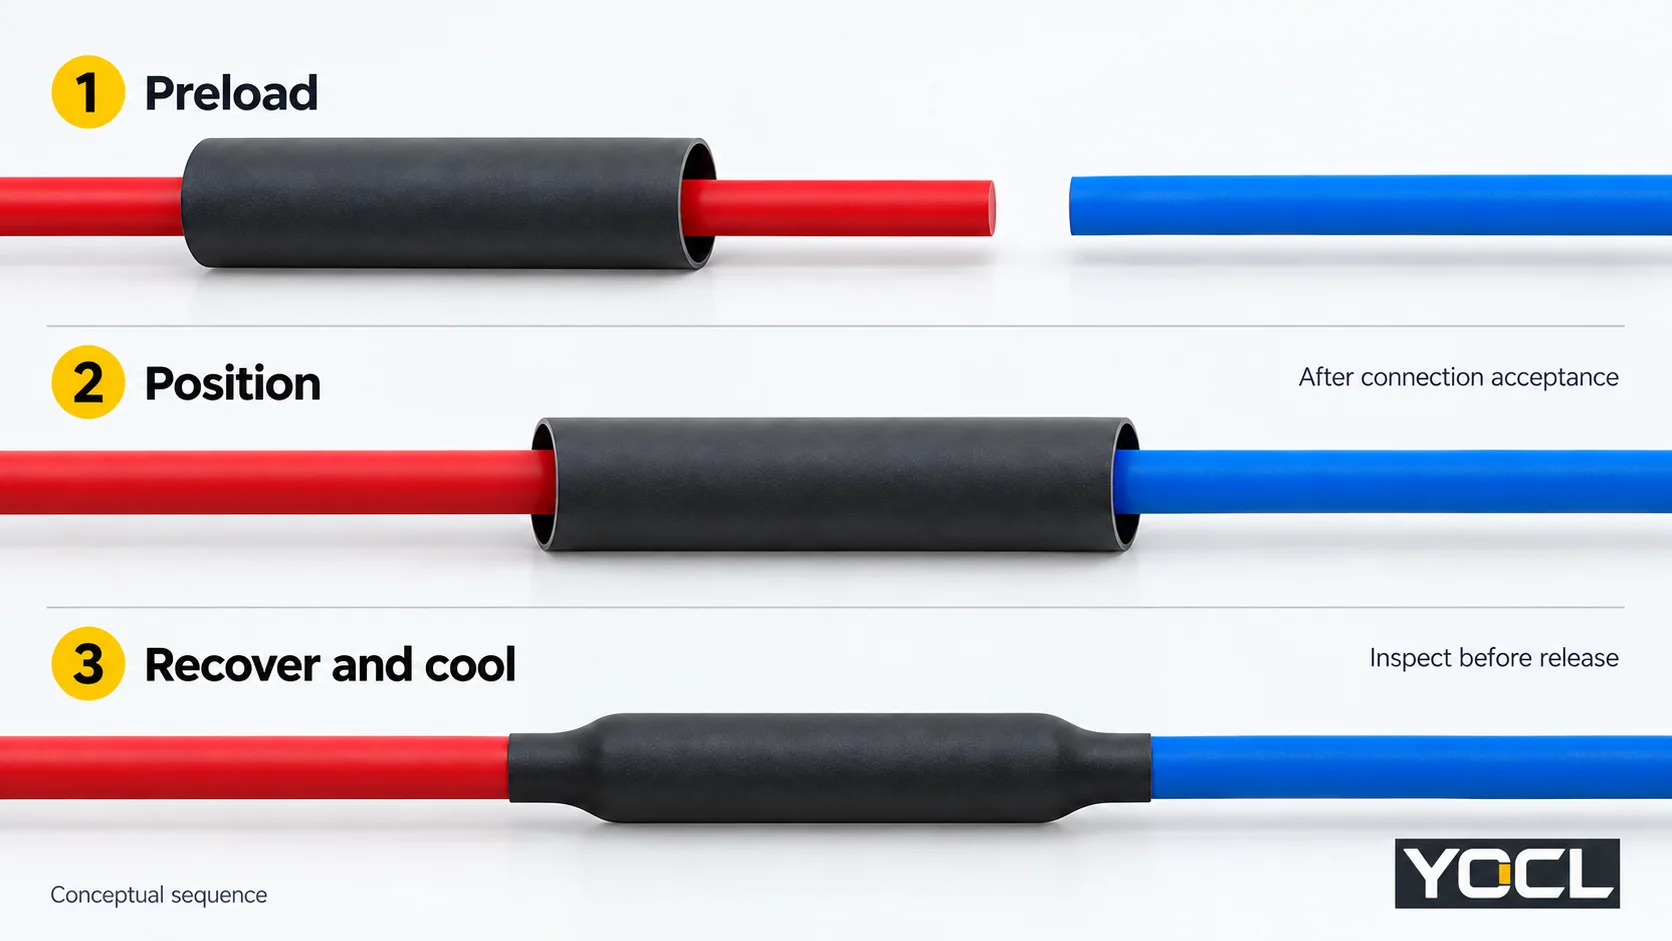
milik YOCL HTS installation notes direct cutting to the required length and sliding tubing on before completing the connection when necessary. Preload the selected sleeve while access remains. Park it clear of the connection-making area under the joining instructions.
If access has been closed without preloading, stop for an approved correction; slitting a standard closed tube does not make it an approved wraparound sleeve.
4. Complete and accept the connection before covering it
Make the splice using its specified connector, conductor combination and joining procedure. Complete the required connection inspection before the sleeve conceals the joint. A failed or undocumented connection remains on hold even if the tubing fits.
Prepare the landing surfaces according to the selected jacket, sleeve and adhesive instructions. If they require cleaning, priming or drying, follow those material-specific directions. Do not improvise a solvent or abrasion method. For an adhesive-lined sealing job, unresolved surface compatibility or preparation means the sleeve is not ready for application.
5. Position the sleeve to the drawing
Move the sleeve into its specified position and check coverage at both ends.
Expected result: the joint and both required landing overlaps lie within the intended finished coverage. Reposition before heating if one end lacks coverage; extra material on the other end does not satisfy that requirement.
6. Recover with the specified heating process
HTS requires uniform recovery with controlled, even heat; other models need their applicable process.
Use the heat source, heating sequence, exposure limits and completion criteria established for the actual assembly. A catalogue shrink temperature is not a heat-gun dial setting, nozzle distance or dwell time. If these process requirements are unresolved, obtain the applicable instructions before heating.
NASA-STD-8739.4A Change 4, §9.9, in its NASA mission-hardware scope, ties heat and exposure to tubing size/type and requires protection of the covered item and nearby heat-sensitive parts. These are useful workmanship boundaries; they do not establish settings for a YOCL splice.
Hold the assembly if the specified recovery cannot be completed within its thermal limits or visible heat damage develops.
7. Cool and inspect the application
Let HTS cool before handling; follow the selected assembly’s cooling and inspection instructions. Check:
- Position and actual finished coverage against the drawing.
- Uniform recovery and grip where required.
- Cracks, punctures, blisters or burned areas, plus damage to the cable jacket.
- Any model-specific adhesive and interface acceptance criteria.
NASA-STD-8739.4A §§9.10–9.11 provide scoped examples of positioning, recovery/grip and visible defect checks. Appearance alone does not establish electrical performance or a complete hidden adhesive bond. An adhesive bead can be a specified local process cue; by itself it does not prove an environmental seal.
Route defects or unresolved sealing to the applicable rework process. The split-or-fail-to-seal guide explains the separate diagnosis task; do not keep reheating without authorized rework instructions.
8. Complete the release record before restoration
Record three separate decisions: connection accepted, sleeve workmanship accepted, dan required assembly tests passed. Enter the cable/splice and sleeve identification, measured coverage, process reference and test results. A missing seal-verification requirement cannot be replaced with “looks tight.”
Complete the specified electrical and, where required, environmental acceptance tests using the assembly procedure. Hold failed or incomplete results. Restore service only through the equipment/site authorization process; OSHA 1910.333(b)(2)(v) sets out restoration checks for its U.S. workplace scope.
For YOCL model selection, provide the pass-over dimension, both landing diameters, required coverage, jacket material and duty when requesting the applicable tubing and process documentation. That information turns a catalogue size candidate into a reviewable application choice.
Referensi
- OSHA — 29 CFR 1910.333, electrical work practices, verification and restoration.
- YOCL — Heat Shrink Tubing, current product families.
- NASA KSC — KSC-E-165 Revision F, §3.8.1.1.1(a), dimensional selection.
- YOCL — HS3X 3:1 Dual-Wall Tubing, supplied/recovered size table.
- YOCL — HTS 2:1 Single-Wall Tubing, Installation Notes.
- NASA — NASA-STD-8739.4A Change 4, §§9.9–9.11, heating and workmanship.