
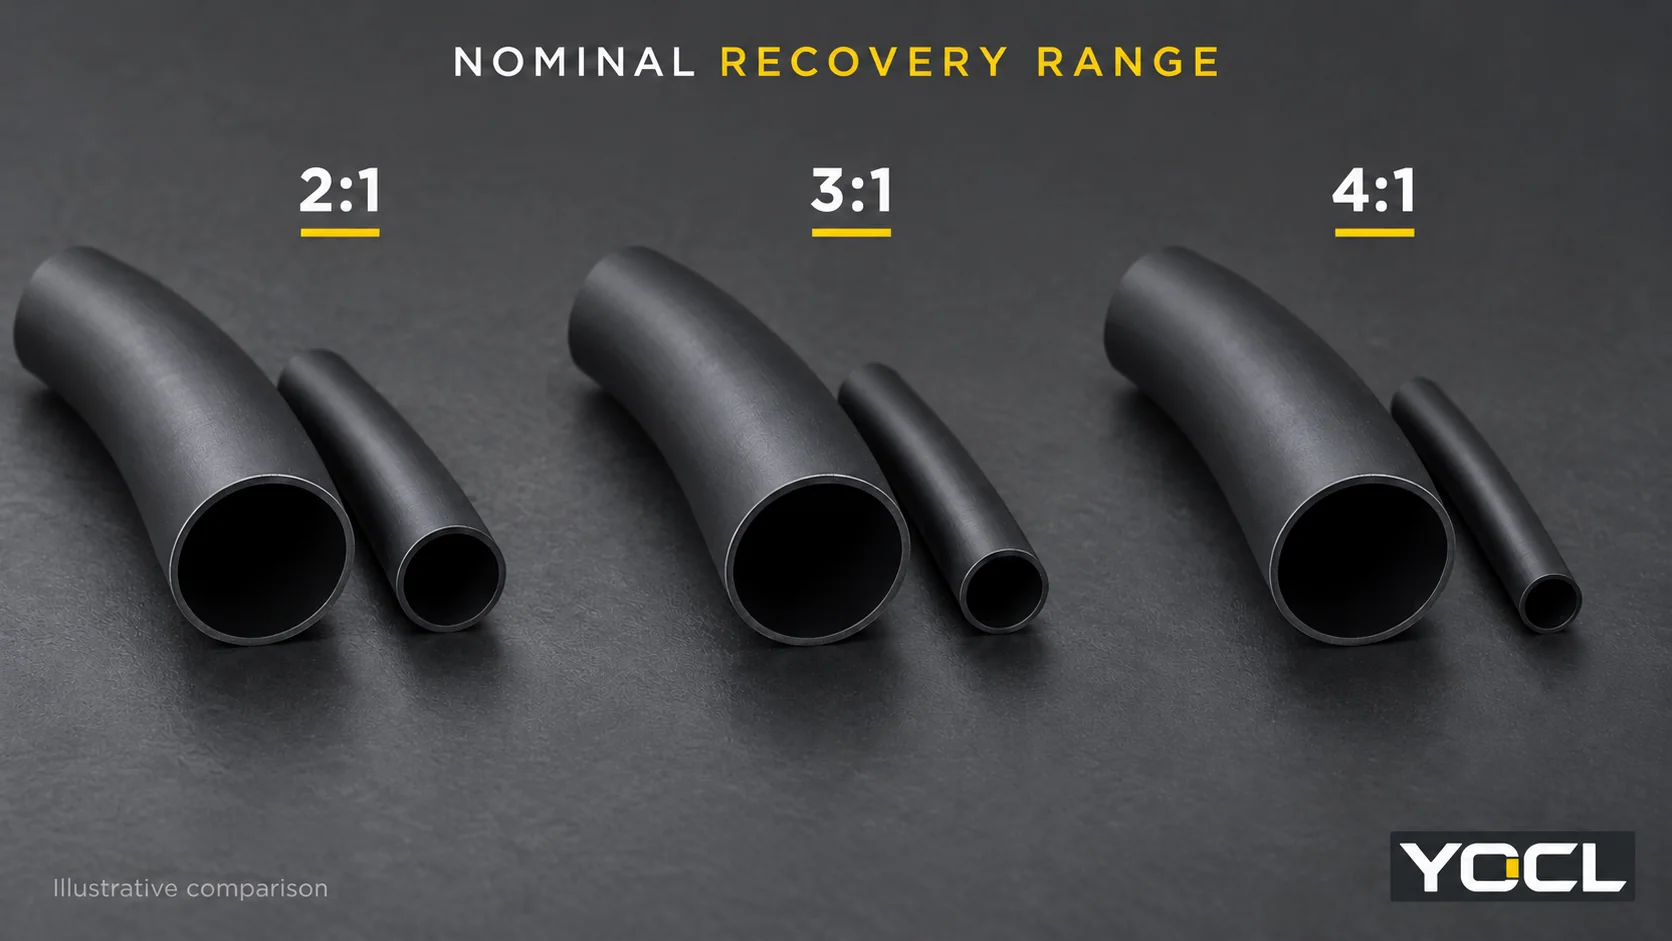
Pilih rasio susut dari transisi diameter yang harus dijembatani oleh selongsong. Lubang pasokannya harus melewati fitur terbesar, dan lubang yang pulih secara bebas harus lebih kecil dari permukaan tersempit yang perlu digenggamnya. Ukuran 2:1 yang sesuai sudah dapat menyelesaikan pekerjaan itu. Pertimbangkan 3:1 atau 4:1 ketika dimensi aktual memerlukan rentang pemulihan yang lebih luas.
Rasio yang lebih tinggi saja tidak memberikan perekat, sambungan yang tersegel, atau peringkat listrik yang lebih tinggi. Bandingkan geometrinya terlebih dahulu, lalu periksa konstruksi dan tugas produk yang sebenarnya.
Bandingkan 2:1, 3:1 dan 4:1 pada geometri yang sama
Rasio susut menggambarkan hubungan nominal antara diameter dalam yang diperluas (ID) dan ID yang pulih secara bebas. Untuk aritmatika yang diidealkan:
ID bebas pemulihan = ID diperluas ÷ nomor rasio
Dengan 15 mm lubang diperluas hipotetis yang sama, 2:1 menghasilkan 7.5 mm, 3:1 menghasilkan 5 mm, dan 4:1 menghasilkan 3.75 mm. Ini adalah titik akhir ilustratif tanpa objek internal yang membatasi pemulihan, daripada dimensi yang dijamin dari tiga produk katalog. Rasio menggambarkan pemulihan diameter; itu tidak membagi panjang potongan atau mengidentifikasi jumlah dinding. panduan terminologi selongsong penyusut panas menjelaskan bidang-bidang terpisah tersebut.
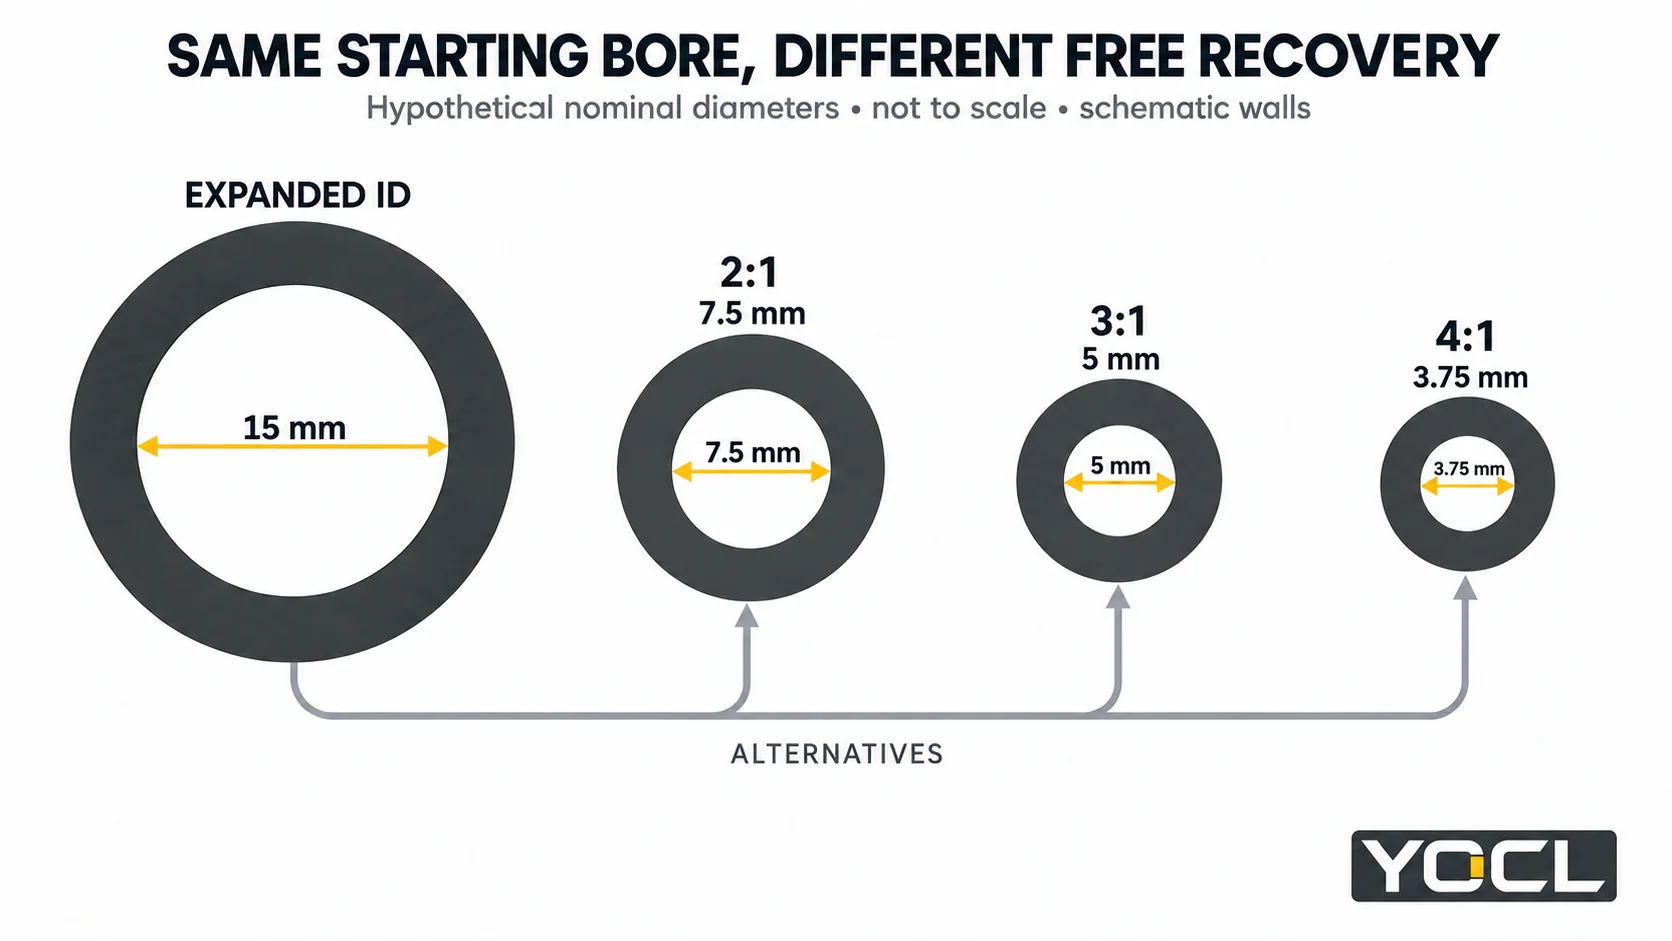
Sekarang pegang fitur bulat terbesar yang harus dilewati selongsong pada diameter luar (OD) 13 mm. Ubah hanya permukaan bulat terkecil tempat ia harus mendarat. Ketiga selongsong hipotetis dimulai dengan 15 mm lubang yang sama, sehingga perbandingan mengisolasi rentang pemulihan mereka.
| OD pendaratan terkecil | 2:1: ID bebas 7.5 mm | 3:1: ID bebas 5 mm | 4:1: ID bebas 3.75 mm | Rasio yang cukup di bawah asumsi ini |
|---|---|---|---|---|
| 9 mm | Di bawah OD pendaratan | Di bawah OD pendaratan | Di bawah OD pendaratan | Ketiganya; 2:1 sudah cukup secara geometris |
| 6 mm | Terlalu besar | Di bawah OD pendaratan | Di bawah OD pendaratan | 3:1 atau 4:1; 3:1 sudah cukup secara geometris |
| 4.5 mm | Terlalu besar | Terlalu besar | Di bawah OD pendaratan | 4:1 saja |
| 3 mm | Terlalu besar | Terlalu besar | Terlalu besar | Tidak ada dari ketiga kandidat ini |
Ini adalah perbandingan hipotetis terkontrol, bukan daftar ukuran yang disetujui. Perbedaan 2 mm antara lubang yang diperluas dan OD yang dilewati adalah celah contoh, bukan kelonggaran yang direkomendasikan. Toleransi aktual, kelonggaran pemasangan, dan rentang aplikasi yang diizinkan masih perlu diperiksa.
Baris terakhir penting: bahkan 4:1 bisa tidak mencukupi. Rasio yang lebih tinggi memperluas rentang nominal, tetapi tidak ada label yang menjamin kecocokan di setiap transisi. Sebaliknya, baris pertama tidak memberikan alasan dimensional untuk menolak 2:1 hanya karena 4:1 tersedia.
Ubah kandidat rasio menjadi ukuran selang yang tepat
Untuk komponen bulat dan selang terbuka, periksa kedua batas dari satu baris ukuran yang tepat:
- Minimum supplied ID > largest pass-over OD
- Maximum freely recovered ID < smallest landing OD
NASA Revisi F, §KSC-E-165 3.8.1.1.1(a) uses this expanded-larger/recovered-smaller principle within Kennedy Space Center electrical ground-support-equipment fabrication. It supports the dimensional relationship, without approving a YOCL product or assembly.
Retain the table’s minimum, maximum and ± signs, component tolerances and specified application allowance. Equality supplies no assured margin. A model’s stated application range may further restrict the usable diameters, even where the preliminary inequalities pass.
If you increase the supplied size to clear a connector, recheck the recovered limit of that larger row. Changing the first diameter can also change the second. Use the ukuran selongsong susut panas for the full lookup and limit conventions.
Free recovery is different from installed fit
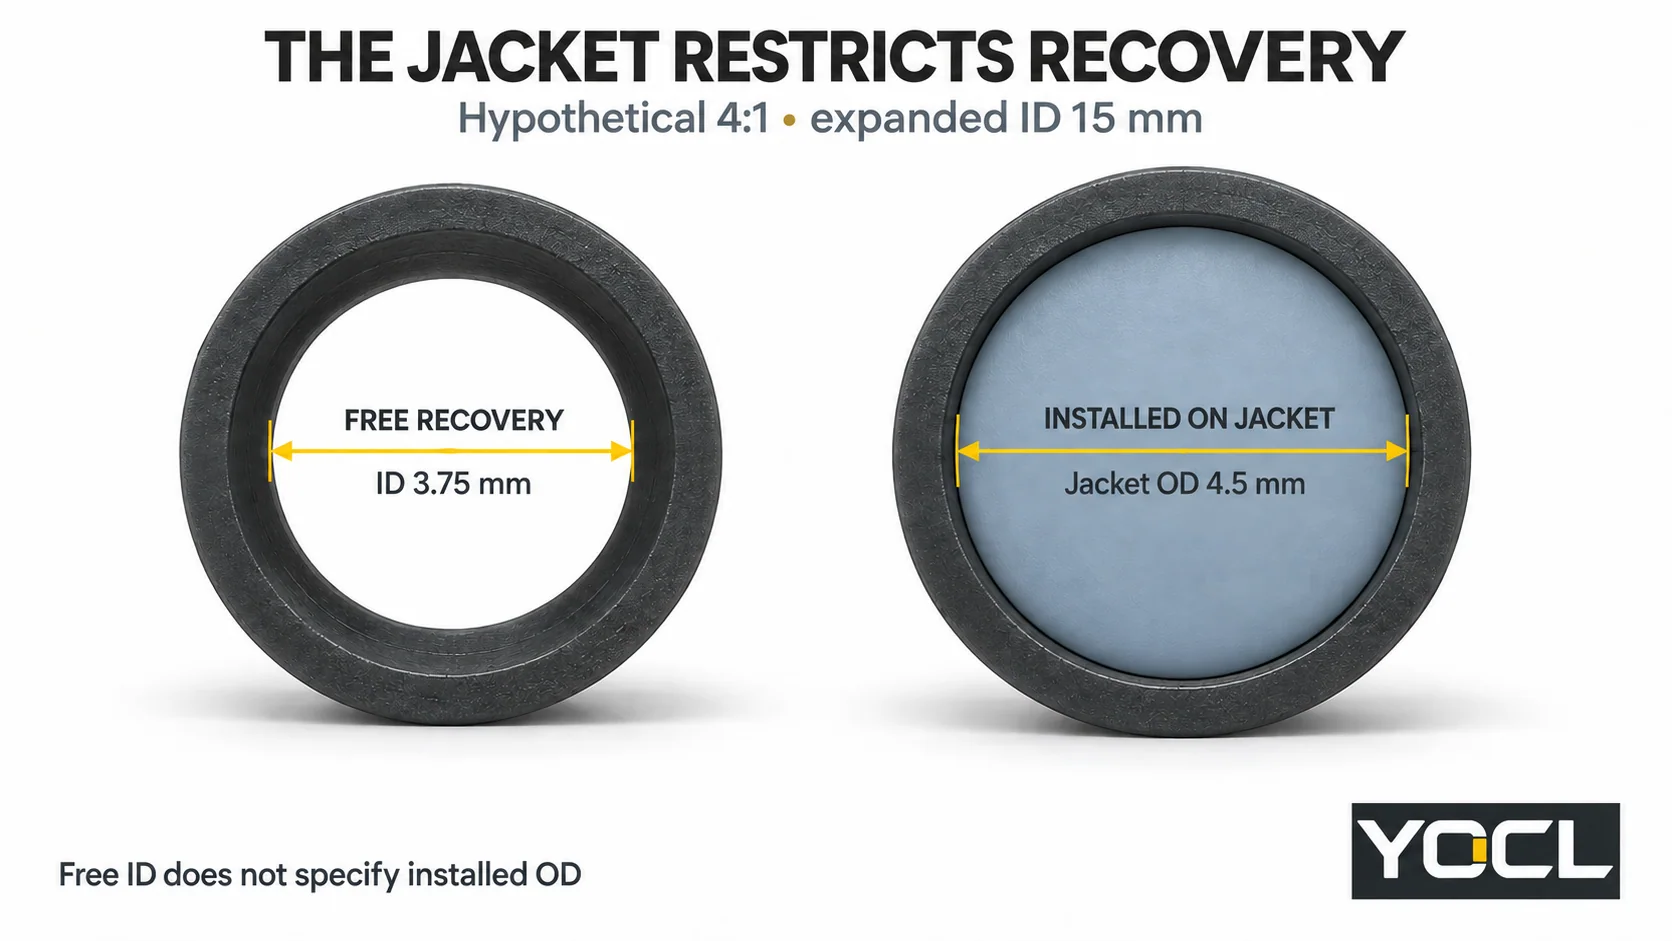
A sleeve installed over a cable stops contracting against the surface inside it. In the hypothetical 4:1 example, a 4.5 mm jacket prevents the bore reaching its empty 3.75 mm endpoint. The endpoint therefore does not specify installed ID, outside diameter or wall thickness.
For a sleeve spanning several surfaces, check the smallest required landing as well as the largest feature it crosses. Irregular connectors, flat busbars, bundles and branches need their actual envelope and contact geometry reviewed; one round OD cannot describe every gap or valley.
A real YOCL 3:1 vs 4:1 comparison
The 3:1 Zero-Halogen single-wall product dan 4:1 Zero-Halogen single-wall product offer a useful same-construction comparison. Both declare no internal adhesive. Their 20 mm supplied-bore entries have different recovered limits:
| Bidang yang diterbitkan | 3:1 single wall | 4:1 single wall |
|---|---|---|
| Size entry | 20.0/6.7 mm | 20.0/5.0 mm |
| Minimum supplied ID | 20.0 mm | ≥20.0 mm |
| Maximum ID after recovery | 6.7 mm | ≤5.0 mm |
| Perekat internal | Tidak ada | Tidak ada |
These are manufacturer declarations from the respective dimension tables, checked 9 October 2026. The 3:1 page establishes minimum and maximum through its column headings; the 4:1 page also prints the inequalities in each row.
For hypothetical 18 mm pass-over and 6 mm landing dimensions, both supplied minima clear the large feature. The 3:1 row’s 6.7 mm recovered maximum does not establish contraction below 6 mm; the 4:1 row’s 5.0 mm maximum does. That makes the latter a dimensional candidate, still subject to allowance and application review. It does not prove a sealed joint.
Keep the published 6.7 mm limit. Replacing it with 20 ÷ 3 would substitute nominal arithmetic for the actual declaration.
Check construction and duty alongside the ratio
The unlined 4:1 example shows why ratio cannot identify adhesive. Where a bonded interface is required, select an appropriate lined product and assess compatibility, contact geometry and sealing evidence. Use the perbandingan dinding tunggal versus dinding ganda for that decision.
Compare actual wall fields and their measurement states rather than assuming 4:1 is thicker or stronger. Also check coverage and declared longitudinal change, permitted recovery conditions, service temperature, electrical duty and required environmental evidence for the exact grade. Diameter ratio supplies none of those values.
A tight exterior or visible adhesive at an end cannot by itself verify the complete sealing interface. If an installed sleeve is already loose, damaged or has an unverified seal, the heat-shrink failure guide addresses that separate investigation.
Make the final choice from the products that pass
Keep 2:1 in consideration when its exact size meets both fit checks and the required function. Move to 3:1 or 4:1 when their documented recovery range solves a transition the lower-ratio candidate cannot cover. If several products pass, compare their construction, installed space, process and duty. If none passes, revise the exact size or connection arrangement instead of assuming extra heat will deliver extra recovery.
For a YOCL size review, provide the largest pass-over dimension, smallest landing dimension, required coverage, jacket material and intended duty through the rentang produk selongsong susut panas. Request the matching size limits, permitted application range and installation information so the final selection identifies a product and size, not just “4:1 heat shrink.”
Referensi
- Pusat Antariksa Kennedy NASA — KSC-E-165 Revision F, 20 December 2021, Electrical Ground Support Equipment Fabrication, Specification for. §3.8.1.1.1(a), printed page 59; scoped expanded/recovered size principle.
- Informasi produk YOCL — 3:1 Selongsong Susut Dinding Tunggal Bebas Halogen. 20.0/6.7 mm row, dimension headings and absence of adhesive; checked 9 October 2026.
- Informasi produk YOCL — 4:1 Selongsong Susut Dinding Tunggal Bebas Halogen. 20.0/5.0 mm row, supplied/recovered bounds and absence of adhesive; checked 9 October 2026.