
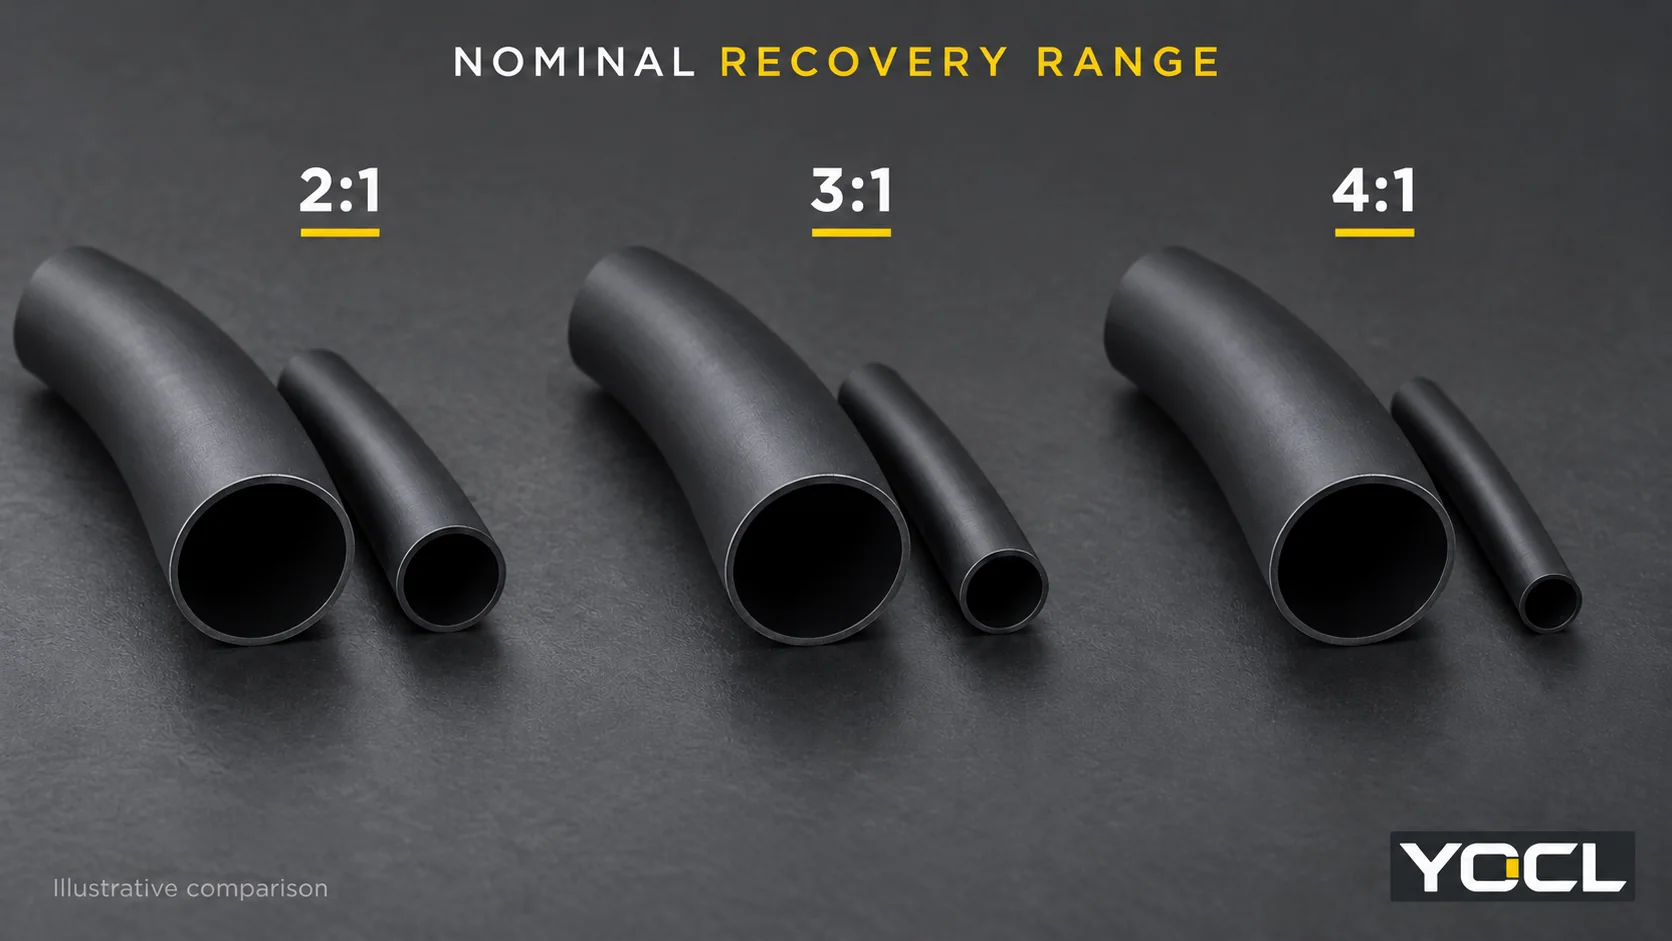
Boru makaranın köprülemesi gereken çap geçişinden büzülme oranını seçin. Sağlanan iç çapı en büyük özelliği temizlemeli ve serbestçe geri kazanılmış iç çapı kavraması gereken en dar yüzeyden daha küçük olmalıdır. Uygun bir 2:1 boyutu bu işi zaten tamamlayabilir. Gerçek boyutlar daha geniş bir geri kazanım aralığı gerektirdiğinde 3:1 veya 4:1'i göz önünde bulundurun.
Daha yüksek oran tek başına yapışkan, sızdırmaz bir bağlantı veya daha yüksek bir elektriksel değer sağlamaz. Önce geometriyi karşılaştırın, ardından kesin ürünün yapısını ve görevini kontrol edin.
Aynı geometri üzerinde 2:1, 3:1 ve 4:1'i karşılaştırın
Büzülme oranı, nominal ilişkiyi tanımlar genişletilmiş iç çap (ID) ve serbestçe geri kazanılmış ID. İdealize edilmiş aritmetik için:
Serbest toparlanma iç çapı = genişletilmiş iç çapı ÷ oran sayısı
Aynı varsayımsal 15 mm genişletilmiş iç çapı ile, 2:1 sonucu 7.5 mm, 3:1 sonucu 5 mm ve 4:1 sonucu 3.75 mm verir. Bunlar, toparlanmayı kısıtlayan dahili bir nesne olmaksızın gösterim amaçlı uç noktalardır, üç katalog ürününün garanti edilen boyutları değildir. Oran, çap toparlanmasını tanımlar; kesilmiş uzunluğu bölmez veya duvar sayısını belirlemez. Bu ısı ile daralan makaron terminoloji kılavuzu bu ayrı alanları açıklar.
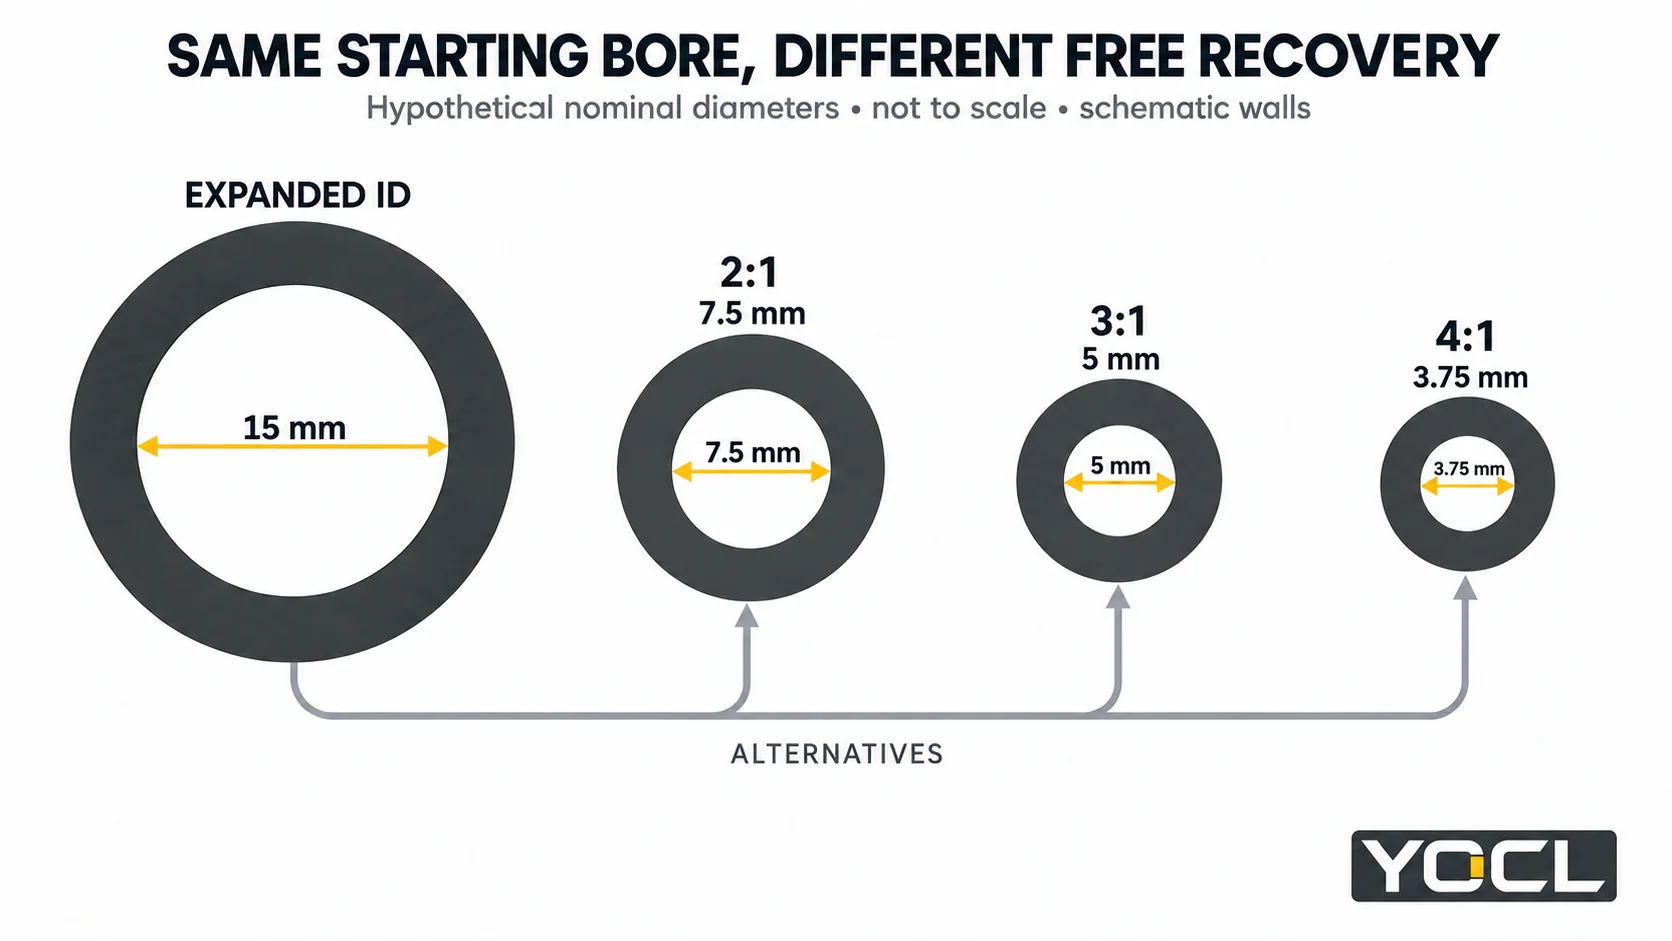
Şimdi makaronun üzerinden geçmesi gereken en büyük yuvarlak özelliği tutun 13 mm dış çap (OD). üzerinde. Sadece üzerine oturması gereken en küçük yuvarlak yüzeyi değiştirin. Varsayımsal üç makaron da aynı 15 mm iç çapı ile başlar, bu nedenle karşılaştırma toparlanma aralıklarını izole eder.
| En küçük iniş dış çapı | 2:1: boş kimlik 7.5 mm | 3:1: boş kimlik 5 mm | 4:1: boş kimlik 3.75 mm | Bu varsayımlar altında yeterli oran |
|---|---|---|---|---|
| 9 mm | İniş dış çapının altında | İniş dış çapının altında | İniş dış çapının altında | Üçü de; 2:1 zaten geometrik olarak yeterlidir |
| 6 mm | Çok büyük | İniş dış çapının altında | İniş dış çapının altında | 3:1 veya 4:1; 3:1 geometrik olarak zaten yeterlidir |
| 4.5 mm | Çok büyük | Çok büyük | İniş dış çapının altında | 4:1 yalnızca |
| 3 mm | Çok büyük | Çok büyük | Çok büyük | Bu üç adaydan hiçbiri |
Bu bir kontrollü varsayımsal karşılaştırmadır, onaylanmış bir boyut listesi değildir. Varsayılan genişletilmiş delik ile geçiş dış çapı arasındaki 2 mm farkı, önerilen bir boşluk değil, örnek bir boşluktur. Gerçek toleranslar, kurulum payı ve izin verilen uygulama aralığı kontrol edilmelidir.
Son satır önemlidir: 4:1 bile yetersiz olabilir. Daha yüksek bir oran nominal aralığı genişletir, ancak hiçbir etiket her geçişte uyumu garanti etmez. Tersine, ilk satır, 4:1 mevcut olduğu için 2:1'ü reddetmek için geometrik bir neden vermez.
Oran adayını kesin bir tüp boyutuna dönüştürün
Yuvarlak parçalar ve açık uçlu tüpler için, her iki sınırı da şuradan kontrol edin tek tam boyut sırası:
- Minimum supplied ID > largest pass-over OD
- Maximum freely recovered ID < smallest landing OD
NASA’nın KSC-E-165 Revizyon F, §3.8.1.1.1(a) uses this expanded-larger/recovered-smaller principle within Kennedy Space Center electrical ground-support-equipment fabrication. It supports the dimensional relationship, without approving a YOCL product or assembly.
Retain the table’s minimum, maximum and ± signs, component tolerances and specified application allowance. Equality supplies no assured margin. A model’s stated application range may further restrict the usable diameters, even where the preliminary inequalities pass.
If you increase the supplied size to clear a connector, recheck the recovered limit of that larger row. Changing the first diameter can also change the second. Use the ısı büzüşmeli makaron boyut tablosu for the full lookup and limit conventions.
Free recovery is different from installed fit
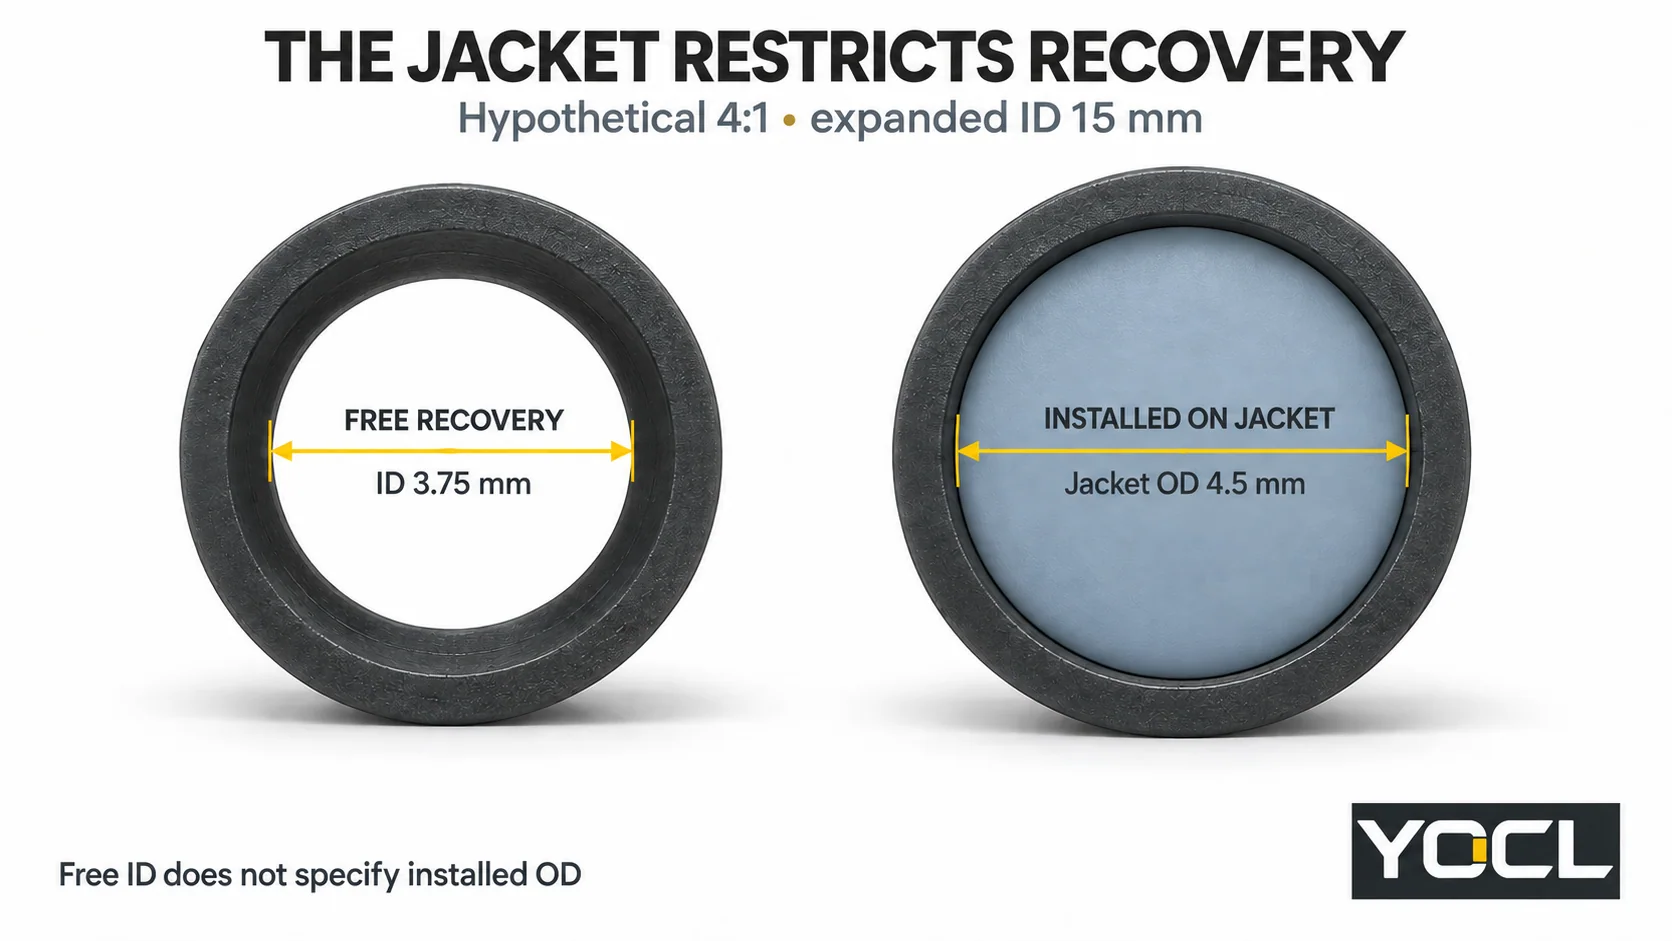
A sleeve installed over a cable stops contracting against the surface inside it. In the hypothetical 4:1 example, a 4.5 mm jacket prevents the bore reaching its empty 3.75 mm endpoint. The endpoint therefore does not specify installed ID, outside diameter or wall thickness.
For a sleeve spanning several surfaces, check the smallest required landing as well as the largest feature it crosses. Irregular connectors, flat busbars, bundles and branches need their actual envelope and contact geometry reviewed; one round OD cannot describe every gap or valley.
A real YOCL 3:1 vs 4:1 comparison
Bu 3:1 Zero-Halogen single-wall product ve 4:1 Zero-Halogen single-wall product offer a useful same-construction comparison. Both declare no internal adhesive. Their 20 mm supplied-bore entries have different recovered limits:
| Yayınlanmış alan | 3:1 single wall | 4:1 single wall |
|---|---|---|
| Size entry | 20.0/6.7 mm | 20.0/5.0 mm |
| Minimum supplied ID | 20.0 mm | ≥20.0 mm |
| Maximum ID after recovery | 6.7 mm | ≤5.0 mm |
| Dahili yapıştırıcı | Yok | Yok |
These are manufacturer declarations from the respective dimension tables, checked 9 October 2026. The 3:1 page establishes minimum and maximum through its column headings; the 4:1 page also prints the inequalities in each row.
For hypothetical 18 mm pass-over and 6 mm landing dimensions, both supplied minima clear the large feature. The 3:1 row’s 6.7 mm recovered maximum does not establish contraction below 6 mm; the 4:1 row’s 5.0 mm maximum does. That makes the latter a dimensional candidate, still subject to allowance and application review. It does not prove a sealed joint.
Keep the published 6.7 mm limit. Replacing it with 20 ÷ 3 would substitute nominal arithmetic for the actual declaration.
Check construction and duty alongside the ratio
The unlined 4:1 example shows why ratio cannot identify adhesive. Where a bonded interface is required, select an appropriate lined product and assess compatibility, contact geometry and sealing evidence. Use the tek duvarlı ve çift duvarlı karşılaştırmasını for that decision.
Compare actual wall fields and their measurement states rather than assuming 4:1 is thicker or stronger. Also check coverage and declared longitudinal change, permitted recovery conditions, service temperature, electrical duty and required environmental evidence for the exact grade. Diameter ratio supplies none of those values.
A tight exterior or visible adhesive at an end cannot by itself verify the complete sealing interface. If an installed sleeve is already loose, damaged or has an unverified seal, the heat-shrink failure guide addresses that separate investigation.
Make the final choice from the products that pass
Keep 2:1 in consideration when its exact size meets both fit checks and the required function. Move to 3:1 or 4:1 when their documented recovery range solves a transition the lower-ratio candidate cannot cover. If several products pass, compare their construction, installed space, process and duty. If none passes, revise the exact size or connection arrangement instead of assuming extra heat will deliver extra recovery.
For a YOCL size review, provide the largest pass-over dimension, smallest landing dimension, required coverage, jacket material and intended duty through the ısı büzüşmeli boru ürün yelpazesi. Request the matching size limits, permitted application range and installation information so the final selection identifies a product and size, not just “4:1 heat shrink.”
Referanslar
- NASA Kennedy Uzay Merkezi — KSC-E-165 Revision F, 20 December 2021, Electrical Ground Support Equipment Fabrication, Specification for. §3.8.1.1.1(a), printed page 59; scoped expanded/recovered size principle.
- YOCL ürün bilgileri — 3:1 Halojensiz Tek Cidarlı Isıyla Daralan Makaron. 20.0/6.7 mm row, dimension headings and absence of adhesive; checked 9 October 2026.
- YOCL ürün bilgileri — 4:1 Halojensiz Tek Duvarlı Isıyla Daralan Makaron. 20.0/5.0 mm row, supplied/recovered bounds and absence of adhesive; checked 9 October 2026.