
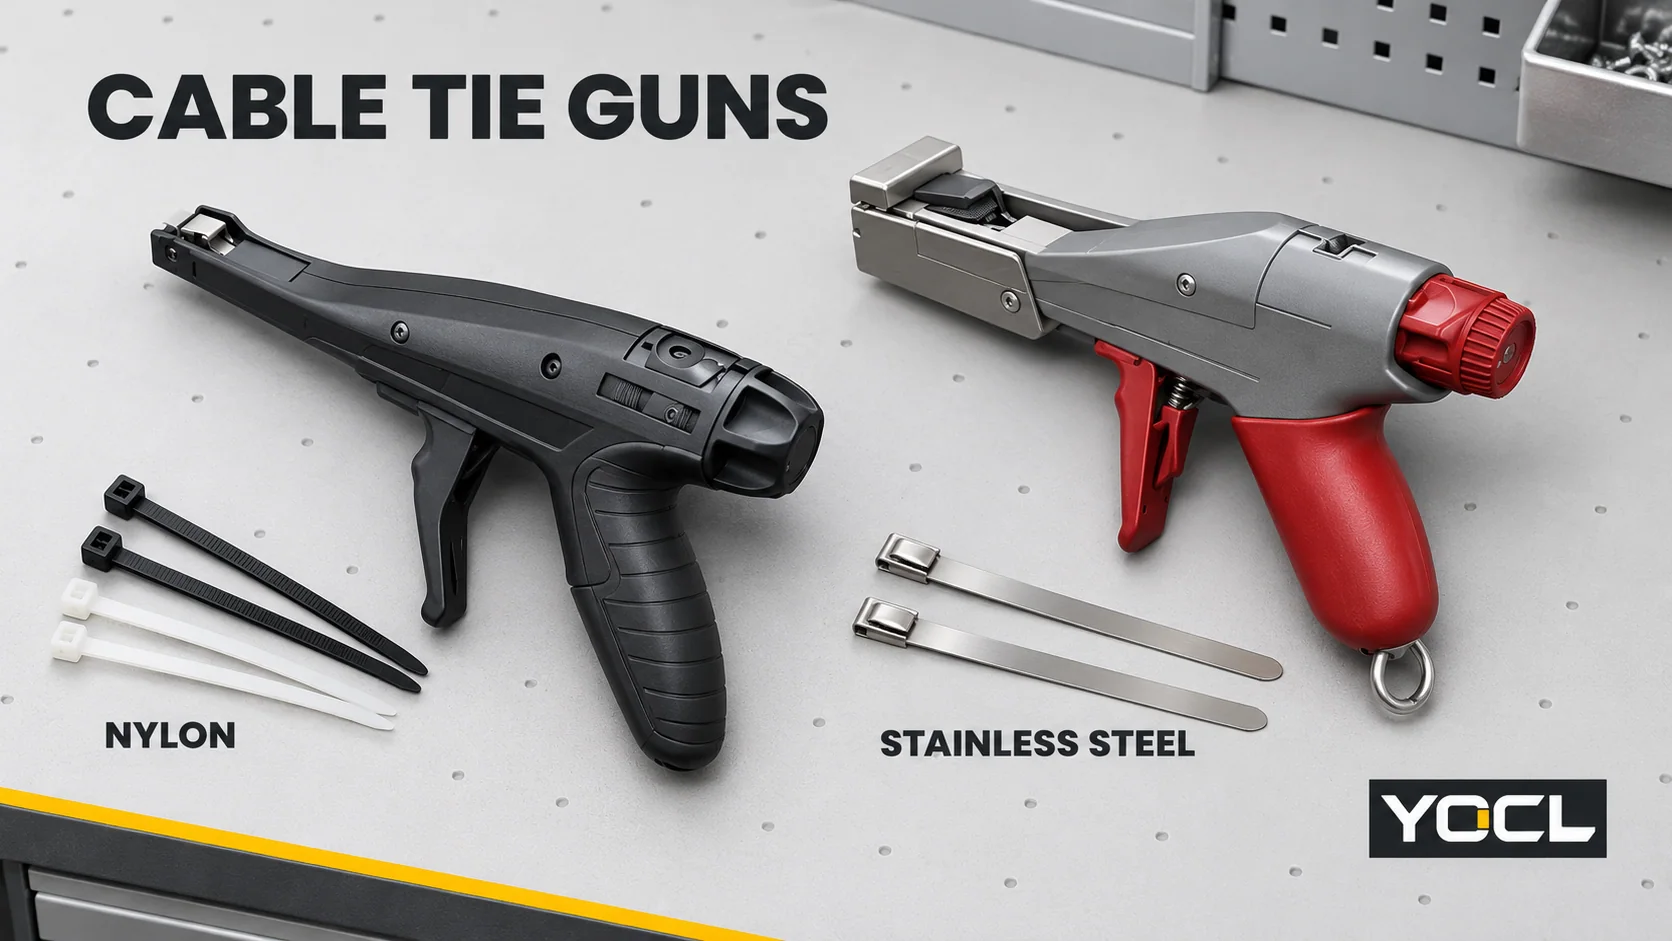
Short Answer: A cable tie gun pulls a compatible tie to a selected tension and, on tools with automatic cut-off, trims the excess tail. Choose it by tie material, tie width and workload. Use a nylon-rated tool for nylon ties and a dedicated metal-rated tool for stainless steel ties. Set tension from the instructions for the actual tool and tie, then check a representative bundle. A dial position is not a universal force value.
The useful buying question is whether the tool can install your particular tie consistently without damaging the bundle. A powerful gun with the wrong nose or blade is unsuitable; an automatic machine can also be a poor fit if its feed system does not accept your ties. Start with the fastener specification, then select the tool and validate its setting.
1. Choose the Tool Type by Feed Method and Power Source
Manual, automatic-feed, battery and pneumatic describe different features. Automatic feed describes how the tie reaches the bundle; battery and pneumatic describe the power source. A battery tool may only tension and cut a tie that the operator has already positioned. A fully automatic system may also loop and thread the tie.
| Tool type | Appropriate starting application | Main tradeoff to check |
|---|---|---|
| Manual tension-and-cut gun | Occasional panel work, repairs and mobile jobs without power or compressed air | Repeated trigger effort; grip size, access and cut-off behaviour matter |
| Automatic-feed system | Repeated bundling on a production line using compatible machine-feed ties | Feed format, supported bundle size, loading and changeover can determine suitability |
| Battery-powered gun | Repetitive work at changing locations, or sites without a nearby outlet | Tool weight, battery support and whether it provides tension/cut only or automatic feeding |
| Pneumatic gun | Repetitive work at a fixed station with a suitable compressed-air supply | Hose access, specified air conditions and workstation layout |
For a manual gun, distinguish automatic cut-off from automatic feeding. A tool can cut at its preset tension while still requiring the operator to present every tie. Conversely, an inexpensive tensioning tool may have a separate cutting action rather than a tension-triggered cut. Verify the actual operating mode before comparing products.
Power does not establish material compatibility. An electrically powered nylon tool is still a nylon tool unless its manufacturer explicitly approves another material. Check the accepted tie families and consumable format before considering convenience features.
2. Understand What the Tension Setting Controls
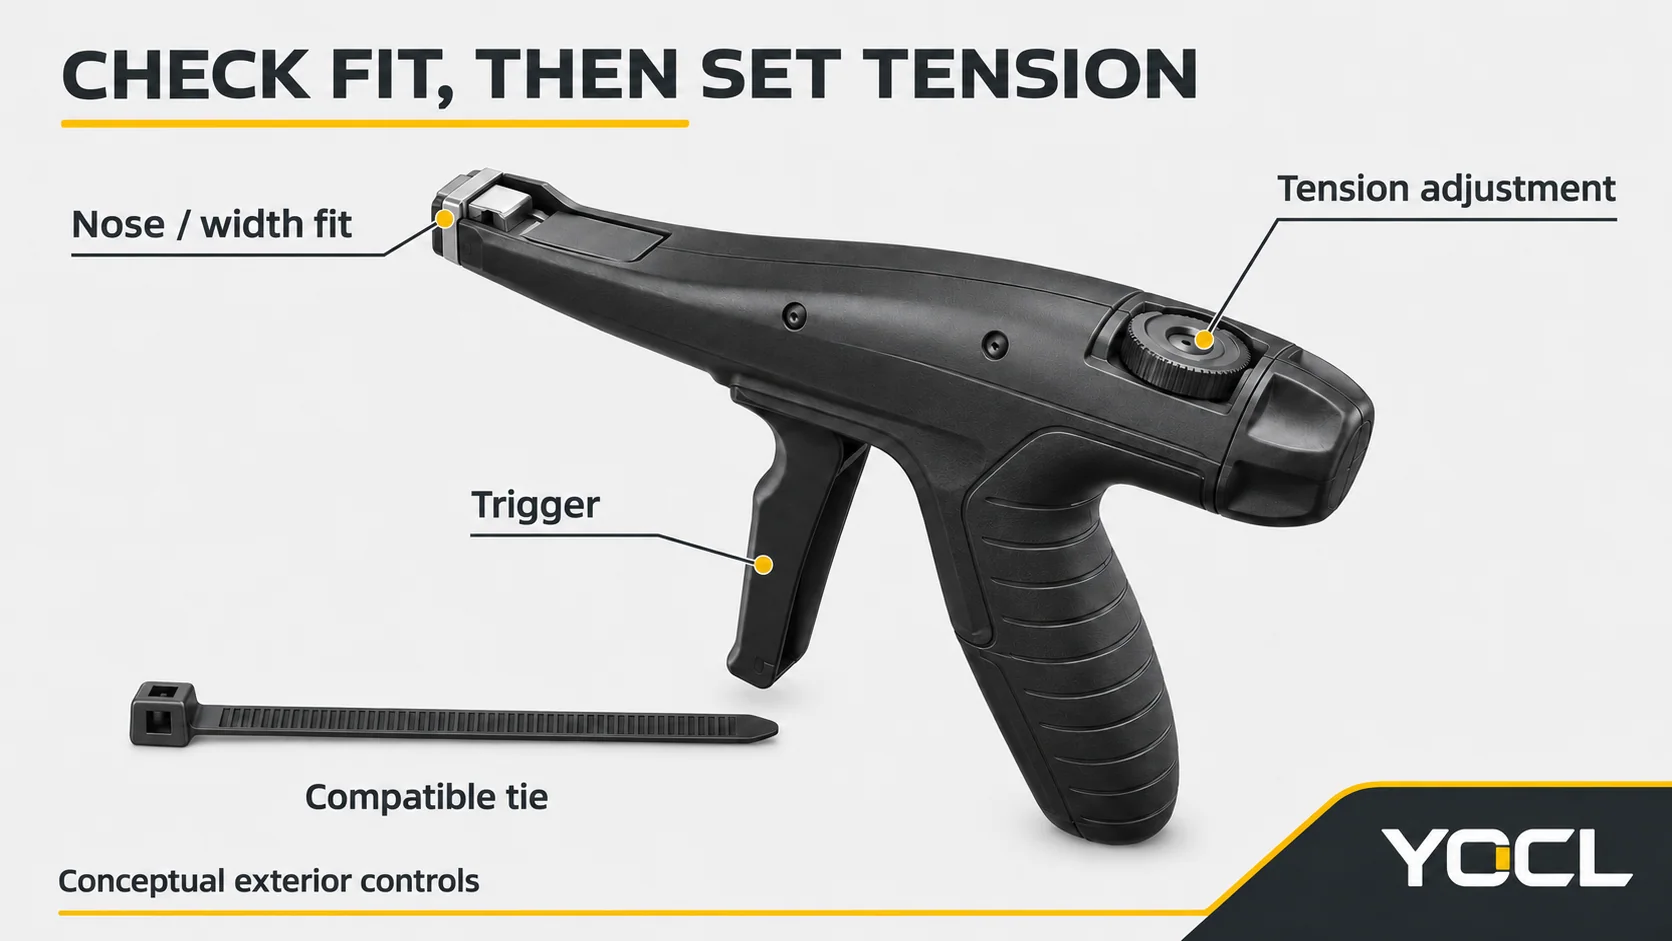
A tension knob, numbered dial or electronic level controls the tool’s pulling or cut-off threshold. On a compatible automatic-cut tool, the mechanism tensions the tail and then operates the blade when its set threshold is reached. A higher setting generally means a higher pulling force within that tool’s scale. It does not mean that the same number produces the same force on another gun.
The National Electrical Manufacturers Association’s cable tie hand-tool guide distinguishes tool tension from minimum loop tensile strength. The former concerns pulling the tail during installation; the latter describes the mechanical performance of the closed tie loop. Neither the published breaking-strength figure nor a fraction copied from another tool’s manual establishes a universal installation setting.
Establish the Setting on the Tool
Use this setup sequence for the selected tool, without substituting it for the tool’s operating instructions:
- Confirm the approved pairing. Record the tie reference, material, width, thickness and head design, together with the tool and nosepiece. Check any approved-tie restrictions in the instructions.
- Find the applicable setting reference. Use the toolmaker’s table or the approved assembly work instruction for that combination. Identify whether the display shows an indexed level or a calibrated force. If no setting is established, qualify it on representative samples within the permitted range before production.
- Adjust using the specified control. Some tools require an adjustment lock to be released; others have coarse and fine controls. Follow the model’s instructions rather than forcing a locked knob. Re-engage its setting lock where provided.
- Check a representative sample. Use the real tie and bundle construction. Confirm secure retention, an undamaged head and strap, acceptable cable insulation and a clean cut-off. A soft jacket or delicate bundle can constrain tension even when the tool can pull harder.
- Record the approved setup. Keep the tool identity, tie specification, setting and sample acceptance together. Recheck when the tie, bundle, nosepiece, blade or tool changes. Where measured force is required, use the maker’s specified test method; the dial alone is not a measurement record.
Why Flush Cutting Matters
A flush cut reduces the projecting tail that can snag hands or abrade nearby insulation. It depends on a compatible head/nose interface, correct presentation and a serviceable cutting mechanism. It does not prove that tension is correct, and the word “flush” does not remove the need to inspect the finished end.
A gun is also different from a cutter used to remove an installed tie. Do not use an installation blade to cut towards the cables or improvise a removal method from the tool’s shape.
3. Keep Nylon and Stainless Steel Tooling Separate
Nylon Cable Tie Guns
A nylon gun has gripping and cutting components intended for its approved plastic ties. Confirm width capacity, head clearance and the tie construction it accepts. Releasable, mounting-head or other specialty ties should not be assumed compatible because their straps fit through the opening.
Use the nylon cable tie types, materials and ratings guide when the tie specification itself is uncertain. Tool selection follows that specification; it does not replace it.
A nylon cable tie gun cannot be used to cut stainless steel ties. A fitting-looking slot or a stronger trigger pull does not give its blade metal-cutting capacity. Attempting the substitution can damage the tool and leave an unsafe cut end.
Stainless Steel Cable Tie Guns
Choose a dedicated metal-rated tool approved for the band’s width, thickness, coating and locking-head design. Metal tooling is built for the higher-force demands of tensioning and cutting steel bands. Its greater capacity is not a reason to apply maximum tension to a vulnerable cable bundle, and a nylon setting must never be transferred to it.
Metal offcuts and cut ends can present sharper injury hazards than plastic tails. Keep hands clear of the nose, gripper and blade; control discarded bands and offcuts. Use task-appropriate hand protection and eye protection for cutting/ejection hazards, as required by the tool instructions and workplace assessment. In US workplaces, OSHA addresses eye and face hazards and hand protection; these provisions do not prescribe a universal glove grade for every job.
The nylon versus stainless steel comparison explains the material decision, while the stainless steel cable tie overview identifies the tie constructions. For band positioning, hand tensioning and the cutting procedure, use How to Tension and Cut Stainless Steel Cable Ties. This article addresses which tool to choose and how to establish its setting.
4. Match Tie Width to Tool Capacity, Then Select Tension
Width is a compatibility input, not a force prescription. Read the tool’s supported width range and check thickness and head geometry as well. A wide strap may require a larger-capacity tool, but a wider tie around soft insulation does not automatically justify a higher setting.
The table below shows typical tool-class ranges in qualitative terms. “Narrow”, “standard” and “wide” are relative bands within the selected maker’s documented range, not universal millimetre classes. There is no verified manufacturer-independent conversion from tie width to Newtons or numbered dial positions. These are generic selection guides, not YOCL tool specifications or universal tension settings.
| Tie-width band and material | Tool class to check | Typical tension-setting range: qualitative only | What limits the final setting |
|---|---|---|---|
| Narrow nylon straps | A compatible fine/small-tie nylon tool | Lower-setting capability is useful; use the maker’s narrow-tie setting reference | Small head/strap geometry and the bundle’s resistance to compression |
| Intermediate or standard nylon straps | General-purpose nylon tension/cut tool with matching nose | The maker’s corresponding application band; a middle dial position cannot be assumed | Actual tie family, head seating and cable insulation |
| Wide or heavy-duty nylon straps | Wide-strap nylon tool with sufficient grip, nose and cutting capacity | A broader or higher-capacity range may be needed; the approved setting can still be low | Tool capacity must not override the bundle’s damage limit |
| Stainless steel bands, including wider/thicker variants | Dedicated stainless tool approved for the exact band and lock | Its own metal-tool range; no transfer from a nylon dial or a different steel tool | Band thickness/coating, lock construction, bundle condition and approved process |
The cable tie size and tensile-strength chart helps identify the fastener’s dimensions and strength category. Keep those fields separate from the tool’s force setting. Minimum loop tensile strength is neither a recommended dial position nor an allowable sustained load on the finished bundle.
For purchasing, request the supported material and tie families, width/thickness limits, compatible nosepiece, setting instructions, cut-off mode and available servicing documentation. A gun advertised only with a maximum width and “adjustable tension” leaves important compatibility questions unanswered.
5. Avoid Setup Errors That Look Like Tool Problems
| Observation or mistake | What to check next | Appropriate response |
|---|---|---|
| Nylon strap cracks, the head is damaged or the jacket is visibly compressed | Excessive setting, unsuitable tie condition, wrong pairing or poor presentation | Stop and assess the damaged parts; qualify a lower permitted setting where excessive tension is established |
| The bundle remains loose or the tie slips after cut-off | Setting too low, incompatible/damaged lock, or gripping/presentation problems | Check the tie and tool before increasing the setting; do not compensate for a defective lock with extra force |
| A nylon gun is used on stainless steel | Tool material rating and blade capacity | Stop using that combination and obtain approved metal tooling |
| The tail binds in the nose or the nose cannot seat properly | Width, thickness, head clearance and access | Change the pairing or nosepiece as approved; do not force the strap or modify the tool opening |
| The gun cuts before the bundle is adequately secured | A low cut-off setting, a changed setting or resistance caused by incorrect fit/presentation | Compare with the approved setup; correct fit and gripping issues before altering tension |
A cracked nylon tie is not proof that the gun is the only cause. Material condition and installation conditions can also matter; use Why Do Nylon Cable Ties Break? for that investigation. This guide’s immediate decision is whether the tool and setup can be returned to a known, acceptable condition.
Do not keep tightening until a symptom disappears. Once a head, strap or cable jacket is damaged, changing the dial does not repair it. Stop the run, identify the affected assembly and follow the applicable rework process.
6. Choose by Workload and Keep the Tool Serviceable
For occasional use, start by evaluating a suitable manual gun. It needs no electrical supply or air line, and avoids maintaining a feed system for intermittent work. Confirm that the grip and nose access suit the operator and assembly.
For repeated work across changing locations, compare a battery tension/cut tool with manual operation on the actual task. Include tool weight, access, charging arrangements and repetitive effort. Lack of a nearby outlet does not automatically require a battery gun: a manual tool also works without site power.
For a stable production line, compare automatic feeding with battery or pneumatic tension/cut operation. Automatic feed is most useful when compatible ties and repeated bundle geometries allow the feeding function to remove a real handling task. A pneumatic tool can suit a fixed workstation with the specified air supply. Include tie loading, jam recovery, offcut collection, setting control and service support in the assessment. There is no universal order quantity at which automation becomes economical.
Cleaning, Blade Checks and Storage
Keep the accessible nose and gripping area free of trapped offcuts and debris, following the manufacturer’s cleaning instructions. Do not add oil, solvent or abrasive cleaning merely because the mechanism feels stiff. A tool described as low-maintenance can still require inspection of wear parts.
Inspect cut quality and the blade/nose condition. Stop using a tool that cannot make a clean cut or shows damage. Isolate its energy source as specified before servicing; blade replacement, adjustment and any internal repairs require the approved parts and procedure, and authorised personnel where required. Increasing tension is not a substitute for a worn blade.
Store the tool clean and protected from moisture, impacts and loose metal scraps. Keep its instructions and approved setting record available. Follow battery and pneumatic-tool storage instructions separately; do not invent a common lubrication interval or service-life figure across these tool classes.
For the fasteners used with your selected tool, review the YOCL cable tie families and cable ties and fixings category. For a tie enquiry, send the tie material, dimensions, head style, quantity and intended application, together with any existing tool compatibility requirement.
FAQ
What is a cable tie gun used for?
A cable tie gun tensions a compatible tie around a bundle and, if equipped for automatic cut-off, trims the surplus tail at its set threshold. It helps control installation consistency and projecting tail ends. The tool must match the tie material and dimensions; an installation gun is not automatically suitable for removing installed ties.
How do I set the tension on a cable tie gun?
Use the toolmaker’s setting reference for the approved tie and application. Operate the specified adjustment knob or control, releasing and re-engaging a setting lock if required. Check the result on a representative bundle and record the accepted setup. Do not convert a tie’s minimum loop tensile strength into a universal dial setting or copy a level from another tool.
Can I use the same cable tie gun for nylon and stainless steel ties?
No. Use separate material-compatible tools: a nylon cable tie gun cannot cut stainless steel ties and must not be used for them. Stainless steel requires dedicated metal-rated gripping and cutting components approved for the actual band and lock. Matching strap width alone does not make the tools interchangeable.
Why does my cable tie gun cut the tie too early?
The cut-off threshold may be set too low or may have changed from the approved setup. Incorrect tie/tool fit or presentation can also make the tool react before the bundle is properly secured. Check compatibility, nose seating, gripping condition and the specified setting before increasing tension. Stop using the tool if the fault persists.
Is a battery-powered cable tie gun worth it for small jobs?
For occasional small jobs, a suitable manual gun is usually the simpler starting choice. A battery tool becomes worth evaluating when repeated effort, difficult access or frequent work at changing locations justifies its weight, charging and servicing needs. Compare it on the real assembly; there is no universal job-count or payback threshold.
References
- National Electrical Manufacturers Association (NEMA), Cable Ties Application Guide No. 8: Why Use Cable Tie Hand Tools?, March 2021, pages 1-3. Industry guidance on tool tension, loop tensile strength, cut ends and application-specific settings; not a universal force table.
- US Occupational Safety and Health Administration, 1910.133: Eye and face protection, applicable eye/flying-particle hazards in US workplaces.
- US Occupational Safety and Health Administration, 1910.138: Hand protection, task- and hazard-based selection in US workplaces.